BeamViz Section
Overview
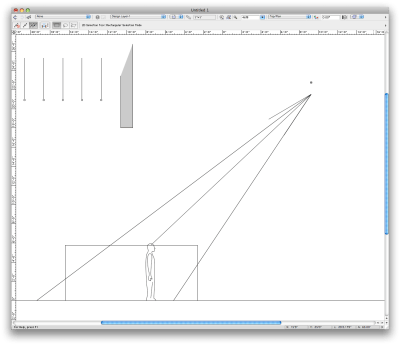
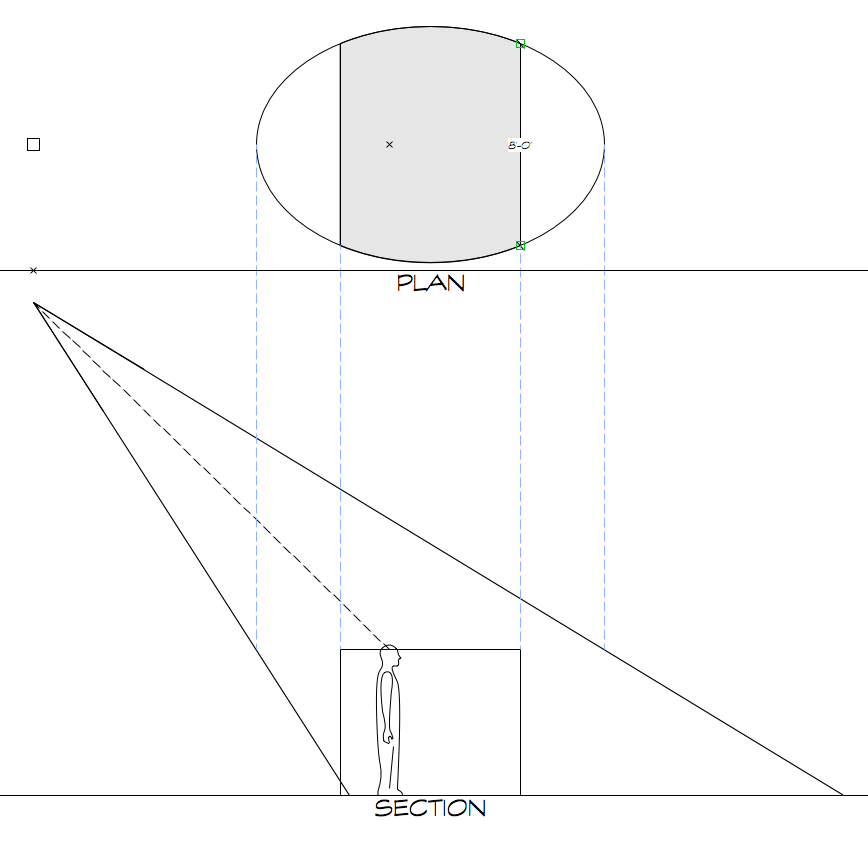
BeamViz Section allows you to draw a 2D triangle of light showing an instrument’s spread in section. You can select beam and field angles for the beam, visualize shutter cuts, display a figure as well as identify an area with minimum coverage width.
If you wish, you can convert BeamViz Section objects to BeamViz objects.
Instructions
Click on the icon.
Select your desired mode and draw a line
Draw from the source of your light to your focus point.
Draw from your focus point of your light to the source.
If you do not have representations of lighting instruments in your section, you can end the line at the hanging position. Next, click the button labeled Shift by clamp height, and your beam will compensate.
Adjust the section’s options, including Field Angle, in Object Info.
To visualize shutters, make sure Draw Shutters is selected in Object Info.
You will see a control point handle towards the ends of the beam section. Drag the point, and the shutter cut will pass through the point.
You cannot open the shutters wider than the field angle permits.
Beam End Modes
To keep beams from extending infinitely, the BeamViz Section has four display modes, selectable in Object Info:
The beam ends will terminate at the floor, as defined by the face plane. In this mode, you can also view a figure whose head is at your focus point.

The beam will terminate at the two draggable control points that also define shutter cuts.
Shutter cut control points are available in the other modes, but they only affect the beam ends in this mode.
The beam ends will terminate on a line horizontal with the focus point.
The beam ends will terminate on a line vertical with the focus point.
This option is useful for visualizing illumination of drops or scenery.
Parameters
As with all Plug-In Objects, the first time you place a BeamViz Section object in a document, Vectorworks will ask you for default parameters. You can set the default object parameters for the document by selecting the object’s tool, then clicking on the parameters button in the mode bar.

Location
- x, y
The coordinates of the origin of your beam, often the gate of your light.
- z
If you want to use the 2D section in a 3D plane, this is the distance above the working plane.
- Rotation
The angle from the light to the focus point.
Beam Options
- Throw Distance
The distance from the light to your focus point.
- Field Angle
The field angle of the beam.
- Beam Angle
The beam angle of the beam. If you do not want to draw the beam angle, enter a value of 0. If you only want to draw the beam angle, enter it in Field Angle.
- Peak Candela
The peak candela of the beam. This is optional and used for computing footcandles.
- Get Light Info Data
Opens a dialog where you can select beam and field data from the symbols in your document and the symbols in your default file. BeamViz will display the footcandles each unit type will output at the current throw.
Display Options
- Show Beam
Deselect to hide the beam edges. You will see a locus at the origin of your beam.
If enabled, your figure will stay visible.
- Display Field Angle
Select to show the field angle indicated next to the beam origin.
- Show Shutters
Select to show shutter cuts and the shutter cut control point handles. If you deselect, any shutter cuts you made will still be preserved.
- Reset Shutters
Press this button to completely open the shutter cuts. Useful if your shutters are all the way in to the center of the beam.
- Beam Ends
This mode option determines where the ends of the beam terminate. See the explanation in the Beam End Modes.
- Extend by
Extend the beam by this distance beyond the points defined in Beam Ends.
Focus Area Options (Available in Focus Area mode)
- Face Plane
The height above the floor to which the beam is focused.
- Show Figure
Draws a 6′ figure at the focus point. You also have a control point handle at the figure’s feet.
- Flip
Draws the figure facing the other direction.
- Show area limits
Use this option to visualize coverage in the plane perpendicular to the section.
For example, say you want to see coverage for an 8' area. After setting Area Width to 8′, you will see a rectangular area that shows the limits of your 8' area.

- Area Width
The width of minimum coverage shown by Show Area Limits.
Origin Options
- Show Clamp Position
Draws a locus and dragable control point at the instrument’s C-clamp.
- Distance to clamp
The distance from the light’s gate to the hanging point of the C-clamp.
- Shift by clamp height
Shifts the origin of the beam down to compensate for the distance between the C-clamp and the light’s origin at the gate.
Useful if you are drawing the section between the hanging position and the focus point, rather than a sectioned view of the lighting instrument.
Computed Info
- Throw Dist
The distance from the light to the focus point.
- Angle to Face
The angle from the face to the light. Straight top light is 90°.
- Footcandles
The computed illuminance of the light.
- Maximum Width
The maximum width of the beam at head height.
Classes
- Auto-Class
This option will create sub-classes based on the object’s overall class, and assign those classes to component parts. BeamViz will only create new classes for component parts that are enabled to draw.
- Class Settings
The following parts can be individually classed or be set to use the same class as the overall object:
Field, Edge, Beam Edge, Focus Vector, Figure, Coverage, Angle Text
- Settings
Global settings that affect BeamViz. See BeamViz Settings
- About
See the BeamViz version and current license information.